­

NOW DAILY UPDATED

How to Use Whatsapp on Asha 205 & Other Unsupported Nokia Phones

Nokia phones like c1, c2, 2700, 3110, x2’s-1-2-5,200 and etc. are not compatible with Whatsapp.  The two sim variants are not always compatible with Whatsapp. If you go to Whatsapp website and you are welcome with “Sorry, your device is not supported at the moment. Make sure you are using a web browser on your phone to view this page”, that simply means your mobile phone is not supported.

To use WhatsApp on your unsupported Nokia phones,  you have to follow any of the methods I dropped below.


1st Method: Steps to Download Whatsapp on your Unsupported Nokia Phones

  1. Get a phone that is compatible with Whatsapp
  2. Insert your memory card and sim card inside the phone that accepts Whatsapp
  3. Download Whatsapp with the phone that accepts Whatsapp with Your sim and memory card inside the Phone
  4. Move the Whatsapp to your memory card after doing that, remove the memory card and sim and insert them back into your phone then check your memory card and locate the Whatsapp and open it… You are Good 2go.

2nd Method: Steps to Download Whatsapp on your Unsupported Nokia Phones

  1. Download the application directly to your phone from here
  2. After download, open the application on your phone
  3. If your phone prompt you to update the application to a newer version, click on yes
  4. After a successful update, open the application and supply your details in the required column and then click continue.
If you follow any of the methods outlined above, by now WhatsApp should be running on your unsupported Nokia phones.

Download BBM on Android & iPhone (Direct Link Here)

I have taken the time to download BBM for Android and BBM, and also uploaded it online.
Android users should click here to download BBM on their devices.
Version: 1.0.0.70
Size: 11 MB
Required: Android 4.0 and up
iPhone users should click here to download BBM on their devices.
Version: 1.0.1.108
Size: 19 MB
Required: iOS 6.0 or later
In case you haven’t registered your email address with BBM, follow the steps outlined below:
-Download and install BBM on Android or iOS devices
-Open up the app, enter your email address and click “Next”
-Exit application completely. (Force Close/Stop)
-Open the app and now you can create an account and be assigned a unique PIN for new accounts.
This works as at the time of this publication. I have already installed BBM on friends’ Android and iPhone devices and the app is working fine.

Why your profile automaticall post vulgar posts ? | Free Download Zone .in| Free,full version,life time software | New tricks-tips| Problem solution

Nokia is Dead, Newkia is taking birth with android OS

RocketDock free full version download for life time | Free Download Zone .in| Free,full version,life time software | New tricks-tips| Problem solution

RainMeter full version free - know your computers' important informations | Free Download Zone .in| Free,full version,life time software | New tricks-tips| Problem solution

How to format a write-protected USB flash drive or memory card

Some memory cards and USB pen drives have write protection switches, which allows you to prevent files from being deleted, or any new files being written to the device. It also prevents the drive or card from being formatted.

Occasionally, you’ll find that a USB flash drive will refuse to format and Windows will tell you that it is write protected, even though there is no switch.
Here are a couple of methods you can try to format the drive and remove the write protection. Bear in mind that there is no guarantee that they will work for you: your drive or memory card may be corrupt or broken and no utility or low-level formatting tool will make it work again. The only solution in this case is to buy a new drive.

Removing write-protection in the Registry using Regedit.exe

In any version of Windows from XP onwards, run Regedit.exe (searching regedit will usually show the program at the top of the list).
Navigate to the following key:
Computer\HKEY_LOCAL_MACHINE\SYSTEM\
CurrentControlSet\Control\StorageDevicePolicies

Regedit StorageDevicePolicies

Double-click on the WriteProtect value in the right-hand pane of Regedit.exe. Change the Value data from 1 to 0 and click OK to save the change. Close Regedit and restart your computer. Connect your USB drive again, and you should find it is no longer write protected. You can now format the drive as normal by right-clicking on it in My Computer and choosing Format.
If you can’t find StorageDevicePolicies, you can try creating a key by right-clicking in the white space in the Control folder and choosing New -> Key and carefully entering the name.

Regedit new key

Now double-click on the new key (folder) and right-click once again and choose New -> DWORD. Name it WriteProtect and set its value to 0. Click OK, exit Regedit and reboot your computer.
If this method doesn’t work, try the following:

Removing write-protection using Diskpart

With your USB drive plugged in, launch a command prompt. Do this by searching for cmd.exe in the Start menu (or Start screen in Windows 8). In Windows XP, click Start then Run, and type cmd.exe in the box.
NOTE: you may need to run Cmd.exe with administrator privileges if you see an “access is denied” message.
To do that, right-click on the shortcut and choose Run as administrator. In Windows 8, simply choose Command prompt (admin).
Now, type the following, pressing Enter after each command:
diskpart
list disk
select disk x (where x is the number of your USB flash drive – use the capacity to work out which one it is)
attributes disk clear readonly
clean
create partition primary
format fs=fat32  (you can swap fat32 for ntfs if you only need to use the drive with Windows computers)
exit
 Diskpart


That's It.. 

Guys Want Free Skype Credits...


Hello Friends.. Today I will Give You a Video Tutorial For Free Skype Credits..
Its Not a Hack. Its a Official Promotion which gives us some vouchers for credits.

Each voucher Gives us 1.53 EURO credit..

Guys You Only Can Redeem 5 Coupans In a Row.. It Will Give 7.65 Euro. Now You are free to call everywhere in the world..

Just Follow The Steps........


1. Open Skype from here or you can type http://www.skype.com/en/

2. Login To Your Account.

3. After Login You Will See an Option named REDEEM VOUCHER 

4. Click on That.

5. Now Put In That box skype voucher code which I will Give You.

6. Now click on REDEEM

7. Wooohhaa You Get 1.53 EUROS in your account.

8. Enjoy Guys.

Skype Coupan Voucher txt file is HERE

You Can Watch My VIDEO TUTORIAL. Its Easy To Understand..


If Any Problem Then Comment Below.


GIVEAWAY!!!HMA Premium IP list for free!!


hidemyass-premium-proxy

Today I have given a hidemyass premium  list.Well Hidemyass.com proxies are very famous for their reliability-since they are one of the pioneers in freedom of speech on the internet in  countries that  censor  it.These Ip’s belong to my personal hidemyass premium account.Please dont advertise them or use them anywhere else.Please find the link below….. Please use them for educational purposes only…I will not be responsible for misuse……
According to Hidemyass Premium proxy features:

Raw .txt format
Proxy lists are sent in a plain .txt format unlike our free lists.
Fresh Proxies
Only proxies which have worked within the past 24 hours are sent to you.

Sortable by PlanetLab/Codden
Planet Lab proxies can be easily distinguished.

Sortable by speed
Each list is sorted by fastest proxies first

Sortable by countries

Proxies are also split up into country lists.

Download Link  http://adf.ly/PyB4l

TOP 10 SOFWWARE YOU MUST HAVE IN YOUR PC, MOBILE, PAD, LAPTOP etc... | Free Download Zone .in| Free,full version,life time software | New tricks-tips| Problem solution

IDM 6.16 Latest version Full version For lifetime | Free Download Zone .in| Free,full version,life time software | New tricks-tips| Problem solution

How this works : Copy This Lines @+[126784790778885:0] after removing "+" sign, How to create your own

How to earn money on internet in free | Free Download Zone .in| Free,full version,life time software | New tricks-tips| Problem solution

Download free IDM 6.15 build 12 latest final release with patch full for life time | Free Download Zone .in| Free,full version,life time software | New tricks-tips| Problem solution

Hurry up! Know How to get the new Glorious Facebook feed, have a look on Future FB | Free Download Zone .in| Free,full version,life time software | New tricks-tips| Problem solution

[FREE] Get Neflix for FREE for unlimited time! [Tutorial]


Hello, this is a method to get FREE Netflix for unlimited time!

1. All you want to do is make your way to http://netflix.com - It should say "Start your free month" like this:

Click that.


2. It will then take you to a page that says to enter your information like this:


3. Enter the correct information.
Now it should take you to a page that says "Start your free month! Cancel online anytime you want.


4.What you then want to do is enter a credit/debit card or login to your PayPal (THIS WILL NOT CHARGE YOU).
Once you have entered it click "I agree to the above conditions and the Terms of Use and Privacy Policy." and click "Start Membership"

5. It should then show a page that says "Welcome back to Netflix! or Welcome to Netflix!" now you want to click "Continue"

6. It should take you to a servey or something and device selection, you don't have to fill out the survey and you can select your device easily. Then click "Done".
You then want to visit: https://movies.netflix.com/CancelPlan this will cancel the bill for the next month but keep the Netflix running until the month is over.

7. Click "Cancel streaming plan"

8. And there you go FREE Netflix! You can do this unlimited times! Just MAKE SURE you cancel the plan after making it before doing anything!

Bypass School Browsing Restrictions

Welcome to another tutorial made by me. This tutorial will provide a quick and easy way to bypass a school/work proxy filter and allow you to browse any site you want.
Things You Will Need

Maxthon Webbrowser (Possibly Not Needed Depending On Your Schools Security Level
http://www.maxthon.com/

Step 1.
Install The Browser (On A USB if your school disallows C:\ and/or D:\ drive installs

Step 2.
In the URL type about:config

Step 3.
Choose Advanced
Spoiler


Step 4.
Tick the Customize Useragent String box (At the bottom of the page)

Step 5.
Copy and paste in this code

Code:

Mozilla/5.0 (compatible; Googlebot/2.1; +http://www.google.com/bot.html)
or
(rarely used): Googlebot/2.1 (+http://www.google.com/bot.html)


Your Useragent box should now look like this
Spoiler


Step 6.
Click anywhere on the page and it should show Settings Saved

This allows you to browse freely and your traffic will be sent as a google crawler, which also has the added benefit of letting you see pages that you need to be logged in for (If they aren't disallowed in robots.txt)


Thats It..

How To Print From Android Devices | Tablet or Phone


Long time ago, mobile phones devices were just used as tools to manage our work and business, with other petty facilities to enjoy it a bit. But now, hand held devices like iPhone or Android have grown invaluably with the heap of features imbedded in them.
Print From Android Through Cloud

Would you like the ability to print your notes or email as soon as you read them? Well, the technology to make that happen now exists on Android and some other mobile platform. But this post will focus on how to print data like images or emails on your Android device wherever you are, at anytime, at anywhere. 

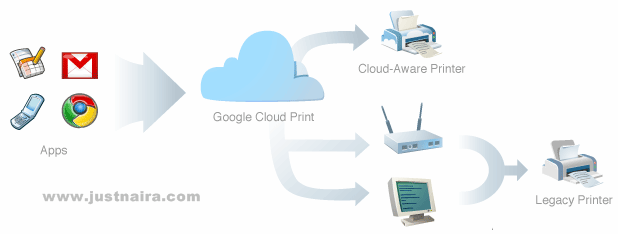
Google Cloud Print is the awesome tool, which enables Android OS users to easily print from their mobile devices. For those who don’t really know the meaning of Google Cloud Print, the Google Account users need to associate their printers with the Google account via this service after which with the help of cloud technology the documents can be printed from your Google account via the assigned printers.

It allows users to print anything from their Android devices, to any cloud-connected printer. Since the file(s) you want to print is/are securely sent to your printer over the web, you don’t need to care whether your printer is at home, or work. You can even print when you are in another continent. You don’t need any complex network setups to start printing on your device. Google Cloud Print comes with the support of printing the files which comes with the formats: pdf, jpg, jpeg, docx, ods, xls, xlsx, ppt and odp.

Some main features of Google Cloud Print are:
- Share printers with friends
- mail printing
- sms printing
- print job management
- internal file browser
- webpage printing
- printer managment ( Printer options )
- Print from clipboard

How to Print on Your Android Using Google Cloud Print

To get started, you need a Google account to use Google Cloud Print. A gmail account will do the work, so you don’t have to worry because you already have one.

You will also need a Google Chrome browser on your PC, before you can connect a printer on your PC to Google Cloud Print. Google Cloud Print connector also needs to be activated in Chrome.

1. Connect your printer to your PC.
2. Click the wrench icon in the upper right hand corner of Google Chrome and then choose “Options”.
3. Click the "Under the Hood" tab. Scroll to the bottom to the Google Cloud Print section and click "Sign in to Google Cloud Print."
4. In the dialog that appears, sign in to your Google Account to enable Google Cloud Print.
5. When you have signed in, you will see a confirmation page

To verify you have successfully connected your printer, print out a test page.

To print from your Android phones and tablets, you can use the built-in Cloud printing features available in Gmail or Google Docs. Alternatively, you can download the Google Cloud Print App to your device from here.

Conclusively, if you only print on rare occasions, you could also consider going through the manual route. All you just do is sync your Android phone or tablet with your PC, copy the data you want to print on your PC, and then print from there. Alternatively, you could email the file to yourself, and then print it from your computer.

Got any option or idea that works? It is welcome. Share it via the comment.

Posted By:-
Wamiq Mirza :)

How to Print Directly from BlackBerry® SmartPhones


Hello Readers.. Here is a post with detailed information on how BlackBerry® users can print from their devices as well.
Print Directly From BlackBerry

The BlackBerry smartphones does not offer a native printing function, but with the help of developers, BlackBerry users can print from their devices without much hassle. The application that does the job is called Remote Print. This app is not the only BlackBerry app that enables printing, it’s just that it has been tested and proved to be working correctly.

Remote Print for BlackBerry isn’t free, it cost $4.99. The application is available on BlackBerry App World. This app can print any file from your BlackBerry device including emails, photos, excel, word, PDF, memos, address contacts, all office documents and more.

Install Remote Print on your BlackBerry and the companion PC Suite on your computer. Select the document you want to print from your BlackBerry and send it to your computer or print it directly. Remote Print will connect to the host computer, which will in turn connect to the printer to print the files.

Bonus: Alternative to Remote Print

Cortado Basic Print is another app that enables printing from your BlackBerry device, it works with Bluetooth printer. This app too isn’t free, but it has a no-cost trial period during which you can evaluate the full versions.

Download and set up Cortado on your BlackBerry. Connect to any Bluetooth-enabled printer, or use a Bluetooth adapter if the printer does not have Bluetooth capability. Select the document you want to print and send it directly to the printer using the application. Choosing this solution will require a monthly service fee. Cortado will add a Print button to your BlackBerry device file menu after installation. 

How to send friend request when your friend req is BLOCKED

How to send friend request on
Facebook when blocked?
You might have gone through this
stage in your Facebook account maybe
at least once, i.e. your friendship
request being blocked for 1 day,3days
or even 1month,i have also gone
through this stage & it feels like
helpless,that we want to send the
friend request to our most dear ones
but we can’t because of this friend
request block.


Here’s what you’ll be needing:


1. Firefox (FF)


2. The FF extension named “Tamper
Data“. (Install it, and then restart FF).
Once the Tamper Data extension is
installed, you’ll find it’s menu item
under the “Tools” menu in FF. Click it
when mentioned below to open it’s
window.


So let’s start, simply follow the steps..
The title of the dialog box says “This
Request Can’t Be sent”, and “Do you
know this user personally?”. We want
to go around this …


Facebook has gotten a little smart and
when you click the “Add as friend”
button on the target’s profile, you may
see the top screen again.


1.You’ll need to get to the “Send
request” screen.


The trick here is to just keep clicking
the “Add Friend” button, and closing
the “Do you know this user personally”
dialog box over and over until the
“Send Request” screen finally pops
up.It may be the second time, it may
be the 50th time, but it’ll eventually
pop up.


2. When it does, go to the “Tools”
menu in Firefox and click the “Tamper
Data” menu item near or at the bottom
of the list.


3. Then click the “Start Tamper” menu
item


4. And then finally try again to send the
friendship request


5. This would open a pop-up window
asking to continue tampering,click on
tamper


Once you’v
e clicked the Send Request
button with Tamper Data started, the
above screen will show, make sure that
the URL shown looks like the above
one, so you’re “adjusting” the correct
data. Then Click the “Tamper” button.
You’ll come to the above screen next.
Follow the instructions as shown and
click the OK button. If or when any
other “Tamper with request” screens
popup while you’re in the middle of
editing the above data, just click the
“Abort request” button on it to get it
out of your way.


Once you click the OK button on the
edit screen you’ll see the above popup
dialog, just click the OK button. This
needs to be done to keep all data
proper before it’s sent.


Once you OK the Content Length
dialog, you should see the above
screen, as if you were never blocked
from sending the Facebook friend
request. If you get the original “this
request can’t be sent” screen again,
just do all of the steps over again. You
may have to do it a few times until it
works. Eventually it will.

Installing the NEW Office 2013 Customer Preview - Step-by-Step


Today, Microsoft CEO Steve Ballmer and Corporate Vice President Kirk Koenigsbauer announced the immediate availability of the Customer Preview of the NEW Office suite - Office 2013!  This latest version of Office provides new support for Touch Input, Cloud services integration and Social collaboration, powering new usage scenarios around digital note-taking, document reading and markup, meetings and presentations.  You can view the official press release here and a video of the launch event here.
Office 2013 Customer Preview Installation Steps
The Customer Preview of Office 2013 can be installed in just a few minutes and co-exists side-by-side with an existing version of Office, so there's no need to uninstall your existing Office.  You will need either Windows 7 or Windows 8 Release Preview as your installed operating system to get started.  The final version of Office 2013 will be able to be deployed via the Office 365 cloud or traditional enterprise software deployment methods, but the Customer Preview steps below are designed to install from the cloud to make it quick and easy to get started with testing.
NOTE: Microsoft Office Professional Plus 2013 Preview is also available for download using a traditional MSI-based installation package. Please note the traditional installation does not support fast cloud-based streaming of the installation or side-by-side operation with older versions of Office, and you will need to uninstall existing Office programs on your PC if you use the MSI-based installation approach.  You can download the .MSI installation bits here if you prefer.
  1. Before getting started, review the Office 2013 System Requirements, located here
  2. To start the Office 2013 Customer Preview installation, visit http://office.com/preview
  3. If you are a home user, click on the "Sign Up" button.  Business users can click on the "Office 365 Enterprise" link to test the most robust business version of the new Office.
  4. Complete a new user profile and create a new Microsoft account.  Note - If you are currently an Office 365 subscription user, you'll need to sign up for a new Microsoft account that is different from your Office 365 login credentials to test the Customer Preview.
  5. Once you've signed up for a new Microsoft account, login to http://portal.microsoftonline.com with your new ID. 
  6. From the Office 365 Admin home page, click the "Download Software" admin shortcut.
  7. Click the "install" button.  This will launch the new "Click-to-Run" installer. (What's Click-to-Run? Here's a technical overview of this new technology)
  8. The new Office installer will launch via Click-to-Run technology.
  9. Review the Microsoft Office licensing agreement and click the "Accept" button
  10. Within a couple minutes, the core of Office will install and you'll be greeted by a short introductory video explaining some of the new Office features.
  11. Choose a look-and-feel to personalize the new Office client applications.
  12. Jump in and start using Office while the rest of Office installs in the background over the next few minutes.
You're now ready to begin testing Office 2013! 

Thank You.. You Guys Join me On Facebook HERE
Wamiq Mirza 

How to Play any YouTube Video with VLC Media Player


VLC Media Player is the most popular and free to use media player that supports all video and audio formats. It also works on Windows, Mac, Linux, Android and iOS.
Play-Youtube-Videos-on-VLC-Media-Player

VLC media player has so many features, but one of its features that will be considered in this post is its ability to play YouTube videos. Using VLC media player to play YouTube videos has so many benefits such as:
  1. Watching your videos without ads.
  2. You will be able to capture a screenshot image of any frame or scene in the YouTube video.
  3. You can change the Playback speed of the YouTube video and make it run slower or faster than the normal speed.
  4. You can also use VLC to watch YouTube videos with slow internet connection.
  5. No web browser or Adobe Flash Player would be required to play videos.

    Follow the steps below to watch YouTube videos on VLC Media Player;

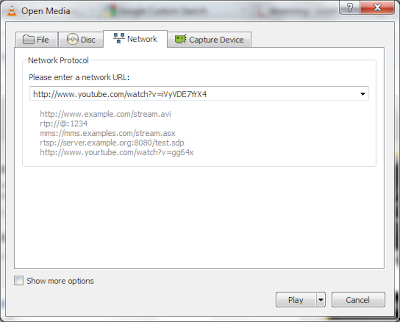
    • Launch VLC Media Player on your computer and then navigate to Media ==> Open Network Stream.
    • Play-Youtube-Videos-on-VLC
    • Now paste the YouTube video URL you want to play
    • How-to-Play-Youtube-Videos-on-VLC-Media-Player
    • Finally click on the Play button, to start viewing your YouTube video on VLC Media Player. 

Tips To Make Computer Games Run Faster


If you’re using an old computer, running 3D computer games like Pro Evolution Soccer, God of War, Call of Duty 4 and the rest might be kind of slow due to high graphic requirements modern games come with. With many installations, useless Windows processes and lots of applications running in the background, CPU usage gets high and there’s a depletion of random access memory (RAM). To make computer games run faster, there are some basic things to do:
1. Reduce the game quality from the game settings
2. Adjust your video card settings and reduce the quality as well
3. Reduce screen resolution for the game
4. Close all running applications before starting a game
5. Stop unnecessary windows processes
6. Starting the game after a restart sometimes increases the speed
7. Install more memory. Increasing your RAM from just 1GB to 2GB or 4GB will make a major difference
8. Update your video card drivers
9. Change your video card if you have to. I recommend Nvidia over ATI though it isn’t bad either. Forget about Intel.
10. Check for malwares and update your antivirus. Running a registry cleaner too helps

If you intend to run you computer game at an optimized speed without necessarily reducing the game quality, then what you need is Game Booster. Game Booster allows you to tweak your system and increase PC performance. It stops all unneeded applications and windows processes, cleans up the RAM and makes your computer game run at optimum speed.
Major Features:
* Game Booster v3 can easily and fast close background processes and unnecessary Windows services, to speed up you game playing and avoid possible conflicts and incompatibility. With the innovative “Enhanced 3rd parties’ services detection” technology, Game Booster v3 can automatically detect and close more unnecessary background services.
* Fine-tunes mouse, keyboard, and specialized game controllers with ease
* Game Booster v3 can tweak your PC for the ultimate system and Internet speed with a single click
* With the improved defragment engine, Game Booster v3 can quickly defragment game directories and files, to make your games load and run faster than ever
* PC gamers know how important to install new drivers for modern PC games. Now Game Booster v3 keeps every game’s specialized drivers up-to-date, including drivers for video/sound cards.
* Game Booster v3 does not overclock your hardware. Game Booster v3 is a freeware, without any virus, adware, and spyware
Game booster does all that with just one click and optimizes your computer’s performance making that game run faster!

List of Best 10 Websites to Stream Music Online Freely


The truth is almost everyone loves music, it’s the types of music individuals listen to that differ. Whenever I’m on the internet working, I always love to have music playing in the background. Streaming music online is legal and only downloading may be a shady business so you don’t have to worry whether what you’re doing is right. There are different websites to stream music but I only use about 5 personally since I consider them the very best. Some of these sites offer premium services that requires you to pay but even without paying you can still enjoy streaming good music 24 hours a day.
1. Deezer
stream music online
These days, I mostly use Deezer since I can eaily listen to most of my old albums i don’t have anymore. Deezer serves you pure music, no bullcrap, no ads. You can have access to all songs and nothing is restricted. Deezer allows to organize playlist and group your favorite songs just the way you want them. You can as well listen to songs offline but that requires a premium subscription and Google Chrome browser.
2. Jango
Jango also lets you stream your favorite songs through your browse. The service is free to use and as far as I know, there’s no premium feature that requires a paid upgrade. The only problem is that the site is heavily ad supported but you can’t blame them. It’s not a big deal getting paid through ads for a free service.
 stream music online
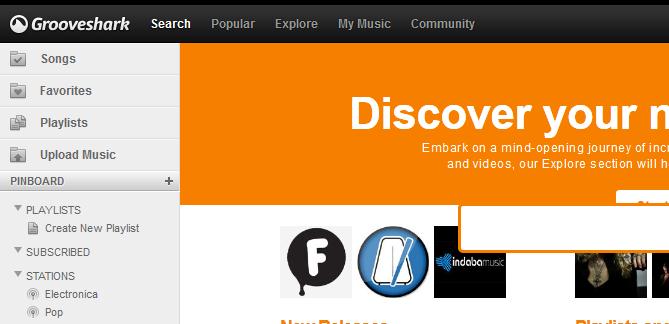
Grooveshark has a user-friendly user interface and there are millions of song in their database. You need to log in with Twitter or Google to use their service is quite great. It’s also ad-supported but there’s an option to remove the ad with a monthly subscription.
4. Myspace
stream music online
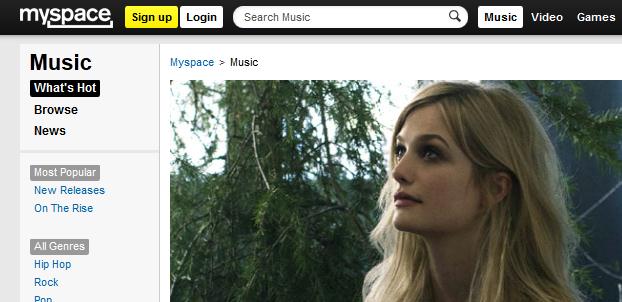
Myspace isn’t that great anymore when it comes to social networking but I still go there for the music.
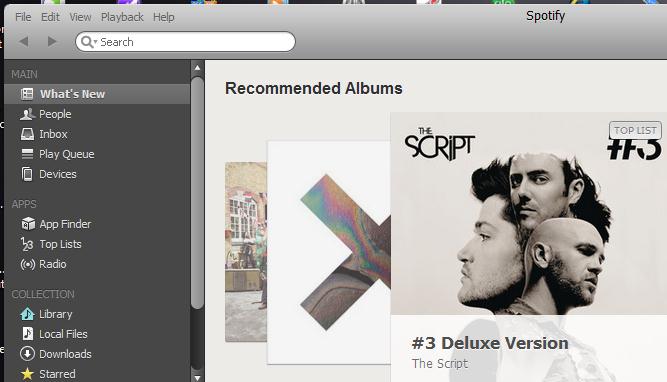
5. Spotify
spotify - stream music online for free
Spotify rocks but the only setback is that you need to install their software on your PC. I’m using the Windows version and it works quite great, the music database is huge, I mean real huge. There are certain tracks I never expected to find on Spotify that I actually found.
Spotify is not available in all countries including Nigeria and India but you can still access it using a VPN to mask your IP address. :P That’s how I use it almost everyday.
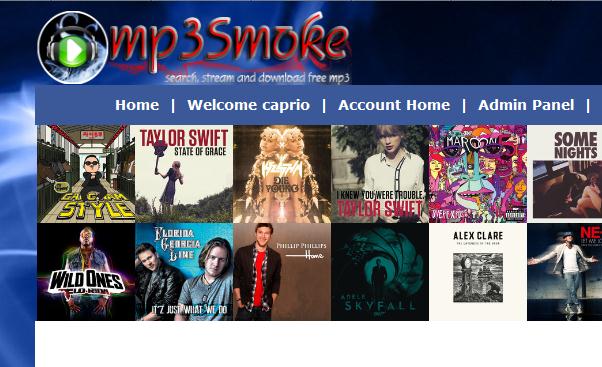
stream music online
Mp3smoke is more like a search engine that lets your search and stream songs online. It’s actually a site I personally created and none of the songs are hosted on my server but the search engine works great and as a registered user, you can create playlists to organize your favorite songs and even save those songs you like to your computer for offline playback.
Others include:
7. Playlist: lets your search for songs and create playlists
8. 8tracks: allows you to create mixes from the songs on your computer and share with other users.
9. Slacker: This is more like an online radio and it’s only available in the United States presently but you can access it from another country using a proxy server or VPN.
10. Soundcloud: This is is probably the most popular cloud music website that allows you to upload and share your MP3 tracks.

Our free services:

Get our toolbar!

Related Posts Plugin for WordPress, Blogger...


Contributors

Total Pageviews

Please Visit This Add

Followers

Copyright @ CODEXTRA PVT. LTD. Powered by Blogger.